Navigation

Ventuz Introduction

  • Introduction
  • Getting Started
  • Ventuz Editions
  • Ventuz Products
  • Realtime Rendering
  • Frequently Asked Questions
  • Common Mistakes
  • Deploying a Ventuz Presentation
  • Scene Performance and Tweaks

Quick Guides

  • Quick Guide Index
  • Business Logic
  • 3D Art
  • 2D Art
  • Programming
  • System Engineer

General

  • Index
  • What's New
  • Ventuz System Requirements
  • Configuration Editor
  • Device Configuration
  • Machine Configuration
  • Render Setup Editor
  • Introduction to Compositions, Screens and Outputs
  • Explanation of Compositions, Screens and Outputs
  • Live Runtime Control
  • Project and Show Management
  • Web Configuration Editor
  • Communication Protocol Overview
  • GPI Configuration for Runtime or Director
  • Introduction to the Ventuz Video Engine
  • Supported Formats
  • Supported Hardware
  • Color Management and HDR Workflow
  • Multisampling / Anti-Aliasing
  • Input Subsystem
  • Ventuz Proprietary Files
  • Migrating Configs & Content to Ventuz 8
  • Migrating Content to Ventuz 7
  • Migrating Content to Ventuz 6
  • Migrating Content to Ventuz 5
  • Summary Shortcuts
  • Terminology
  • Manual Index

Ventuz Designer

  • Designer Indices
Introduction
  • Designer Introduction Index
  • Designer Overview
  • Realtime Rendering
  • Project Browser
  • Designer Interface
  • Designer Options
  • Working with Nodes
  • Hierarchy and Content Editors
  • 2D Workflow
  • 3D Workflow
  • PBR Workflow
  • Animation Workflow
  • Best Practices
  • Reading Data in Ventuz
  • Display Images and Movies
  • Scene Performance and Tweaks
  • Deploying a Ventuz Presentation
  • Render to Disk
  • Multi Screen and Output Setup
  • Explanation of Compositions, Screens and Outputs
  • Workflow of using Multi Screens
  • Multi GPU
  • Previs
User Interface
  • Designer User Interface Index
  • Designer Interface
  • Renderer Window
  • Layer Editor
  • Property Editor
  • Property Groups
  • Hierarchy Editor
  • Content Editor
  • Find and Replace
  • Toolbox
  • Animation Editor
  • Shader Editor
  • Text Editor
  • Message View
  • Scene Tree
  • Stage Editor
  • Container Outline
  • Watches Editor
  • Scene Control Window
  • Performance Statistics
2D Workflow
  • 2D Workflow Index
  • 2D Workflow
  • Layer Editor
  • Common Layer Properties
  • IPP Effects
  • Color Correction FX
  • Distortion FX
  • Filter FX
  • Hierarchy and Content Editors
  • Display Images and Movies
3D Workflow
  • 3D Workflow Index
  • 3D Workflow
  • Hierarchy and Content Editors
  • Renderer Window
  • Camera Navigation
  • Manipulate Objects with Gizmos
  • In-Scene Editing
  • Layer Editor
  • Property Editor
  • Hierarchy Editor
  • Working with Nodes
  • Isolated Objects
  • Containers
  • Text Rendering
  • Character Sets
  • Geometry Import
  • Color Management and HDR Workflow
  • Display Images and Movies
  • Particle System
  • Creating Realistic Reflections
  • Unreal Integration
  • Notch Integration
  • E2E Node Overview
Logic Workflow
  • Logic Workflow Index
  • Hierarchy and Content Editors
  • Content Editor
  • Hierarchy Editor
  • Working with Nodes
  • Property Editor
  • Containers
  • Project and Scene Data
  • Reading Data in Ventuz
  • Display Images and Movies
  • Input Subsystem
  • Multitouch
  • TUIO Protocol
  • Open Sound Control
  • Unreal Integration
  • Notch Integration
  • E2E Node Overview
Animation Workflow
  • Animation Workflow Index
  • Animation Workflow
  • Animation Editor
  • Content Editor
  • Hierarchy Editor
  • Property Editor
  • Animation and State Engine
  • Templates
  • Template Engine
  • Scene Transitions
  • Unreal Integration
  • Notch Integration
Project Structure
  • Project Structure Index
  • Annotations
  • Project Documentation
  • Projects and Scenes
  • Project Properties
  • Project Maintenance
  • Project and Scene Data
  • Scene Management
  • Scene Statistics
  • Scene Tree
  • Performance Statistics
How Tos
  • Designer How to Index
  • How to Run Ventuz
  • How to Work with Designer
  • Ventuz Designer Drag&Drop Workflow
  • How to work with Shadows
  • How to Build Content for Multiple Screens
  • How to Use Emoijs
  • How to Build a Template
  • How To Build a Custom Scene Transition
  • How to Use the Color Difference Keyer
  • How To Enable HDR Video Output
  • How To Work with the HDR Layer
  • How Create Lens Flares and Bloom
  • How to Create Visuals Loader Node
  • How to Remote Control with a Phone
  • How to use Head Mounted Displays
  • How to work with 3D Reference Layers
  • How to create a Firework Particle System
  • How to use DDS with new Block Compression modes
  • How To use Stream Out
  • How to use the Substance Integration
  • How To Integrate Unreal
  • How To Integrate Notch
  • How To use the Vertex Integration
  • How To Control and Customize Ventuz
  • How to use the Companion with Director
  • How to build Previs scenes with Designer
  • How to migrate from Ventuz 6 to Ventuz 7
Reference
  • Available Nodes
  • Animation Nodes
  • Material&Color Nodes
  • Data Nodes
  • E2E Nodes
  • Geometry Nodes
  • Interaction Nodes
  • IO Nodes
  • Layers
  • Light Nodes
  • Logic Nodes
  • Previs Nodes
  • Render Option Nodes
  • Slides Nodes
  • Sound Nodes
  • Text Nodes
  • Texture Nodes
  • VR Nodes
  • World Nodes
  • Summary Shortcuts
  • Layer Editor Shortcuts
  • Hierarchy Editor Shortcuts
  • Content Editor Shortcuts
  • Animation Editor Shortcuts
  • Director Shortcuts

Ventuz Director

  • Index
  • What's New in Director
  • Introduction
  • Environment
  • Show
  • User Interface
  • Assets
  • Taking Action
  • Property Editor
  • Shot Box
  • Project Data
  • Pages
  • Playlist
  • Transitions
  • Timeline
  • Content References
  • Topology
  • Channels
  • Macros
  • Designing Templates
  • Scene Transitions
  • Plug-Ins
  • Shortcuts
  • Command Line Options
  • Application Settings
  • Glossary
  • GPI Configuration

Ventuz Runtime & Configuration

  • Runtime Index
  • Configuration Editor
  • Machine Configuration
  • Device Configuration
  • Project and Show Management
  • Live Runtime Control
  • Web Configuration Editor
  • Render Setup Editor
  • Warping and Soft-Edging Editor
  • Multi Screen and Output Setup
  • How to migrate from Ventuz 6 to Ventuz 7
  • Machine Clustering
  • Supported Hardware
  • Director Mode
  • How to Configure Audio
  • How to Use Live Options
  • How To Play Out On Multiple Screens
  • How To Render on a Machine Cluster
  • How to Use Head Mounted Displays
  • How to Setup Spout with Ventuz
  • How to Use Newtek NDI
  • How to Use a Mixed Frame Rate Cluster
  • How to Use Tracking

Multi Output & Display Setups

Introduction
  • Introduction to Compositions, Screens and Outputs
  • Explanation of Compositions, Screens and Outputs
  • Machine Clustering
  • Support for multiple GPU's
Editors
  • Configuration Editor
  • Device Configuration
  • Render Setup Editor
  • Warping and Soft-Edging Editor
  • Designer Stage Editor
Workflows
  • How to Build Content for Multiple Screens
  • How To Play Out On Multiple Outputs
  • How To Render on a Machine Cluster
  • How to build Previs scenes with Designer

How To

Designer
  • Designer How to Index
  • How to Run Ventuz
  • How to Work with Designer
  • Ventuz Designer Drag&Drop Workflow
  • How to work with Shadows
  • How to Build Content for Multiple Screens
  • How to Use Emoijs
  • How to Build a Template
  • How To Build a Custom Scene Transition
  • How to Use the Color Difference Keyer
  • How To Work with the HDR Layer
  • How To Enable HDR video output
  • How Create Lens Flares and Bloom
  • How to Create Visuals Loader Node
  • How to Remote Control with a Phone
  • How to use Head Mounted Displays
  • How to work with 3D Reference Layers
  • How to create a Firework Particle System
  • How to use DDS with new Block Compression modes
  • How to use the Substance Integration
  • How To Integrate Unreal
  • How To Integrate Notch
  • How To build and playback Ventuz Content in Vertex
Runtime & Configuration
  • Runtime How Tos Index
  • How to Configure Audio
  • How to Use Live Options
  • How To Play Out On Multiple Screens
  • How To Render on a Machine Cluster
  • How to use Head Mounted Displays
  • How to setup Spout with Ventuz
  • How to use Newtek NDI
  • How to use a Mixed Frame Rate Cluster
  • How to use Tracking
  • How To Integrate Unreal
  • How To Integrate Notch
  • How To build and playback Ventuz Content in Vertex
  • Multi Screen and Output Setup
  • How To Enable HDR video output
Director
  • How To Control Multiple Graphics Independently From Each Other
  • How to use the Companion with Director

Ventuz Node Reference

Available Nodes Overview
  • All Designer Nodes
ANIMATION
  • Mover
  • Alternator
  • Simple Control
  • Timeline Control
  • Anmation Rig
  • Keyframe Animation
  • Animation Group
COLOR/MATERIAL
  • Alpha
  • Fog
  • Ground Fog
  • Sky Box
  • Color to RGBA
  • HSLA to Color
  • RGBA to Color
  • Color Transformer
  • HLSL Shader
  • Color
  • Material
  • Color Picker
  • Substance Material
DATA
  • Database
  • Excel
  • JSON
  • RSS Feed
  • Resource Linker
  • Text File
  • XML
E2E
  • E2E Axis
  • E2E Data
  • E2E Control
  • E2E Layer
  • E2E Provider
  • E2E Node Overview
GEOMETRY
  • Rectangle
  • Rounded Rectangle
  • Gradient Rectangle
  • Overlay Rectangle
  • Cube
  • Circle
  • Sphere
  • Cylinder
  • Cone
  • Torus
  • Chart
  • Random Points
  • Mesh Loader
  • Geometry Import (Live)
  • Volume
  • Get Bounding Box
  • Arrow
  • Particle System
  • Path Renderer
  • Geometry Renderer
INTERACTION
  • Interaction Rect
  • Touch Button
  • Touch Excluder
  • Touch Marker
  • Touch Paint
  • Touch Pattern
  • Touch Proxy
  • Touch Ripples
  • Touch Transformations
  • Web Browser
  • Touch Teleport
  • Touch Simulator
INPUT/OUTPUT (I/O)
  • GPI
  • Joystick
  • Keyboard
  • MIDI
  • Mouse
  • Network
  • Open Sound Control
  • Serial
  • Timecode
  • DMX
  • HTTP
  • RamDiskWriter
LAYER
  • 3D Layers
  • 3D Layer Reference
  • Composition Layer
  • 2D Layers
  • PSD Import Layer
  • E2E Layer
  • Mixer Layer
  • Others
LIGHT
  • Light Sources
LOGIC
  • Array Processing
  • Convert To Text
  • Cluster Synchronization
  • Counter
  • Data Portals
  • Date Time
  • Directory
  • Dispatcher
  • Enumeration
  • Expressions
  • Invert
  • Log
  • Loop Breaker
  • Math Effects
  • Matrix Operations
  • Scene Event
  • Script
  • String Operations
  • System ID
  • Render Setup Relation
  • Text Splitter
  • Timer
  • Toggle
  • Transition Info
  • URL
  • Value Switch
  • Value Buffer
  • Variables
  • Visual Indexer
PREVISUALIZATION
  • Introduction to Previs
  • Previs Screen
  • Previs Canvas
  • Compositon List
  • Rendersetup Objects
  • Composition Projector
  • Previs Screen Render Options
RENDER OPTIONS
  • Alpha Blending
  • Color Write
  • Alpha Testing
  • Clip Plane
  • Filter
  • Mask
  • Mirror
  • Effect
  • Render Cube Map
  • Draw Modes
  • Stencil
  • ZTesting
SOUND
  • Audio Clip
  • Sound
  • Volume Control
  • Audio Analysis
SLIDES
  • Slide Manager
  • Slide
  • Slide Port
  • Pivot
TEXT
  • Text Effects
  • Text Layouts
  • Text Rendering
TEXTURE
  • Background
  • Hatch
  • Image
  • Texture
  • SVG Loader
  • Gradient Texture
  • Live Video
  • Movie Stream
  • Movie Frame
  • Movie Clip
  • Texture Loader
  • Snapshot
  • Snapshot Framebuffer
  • Texture Saver
  • Video Source Selector
  • VIO Input
  • Spout Receiver
  • NDI Receiver
  • Substance Loader
  • QR Code
VR/AR
  • Tracked Devices
  • Draw Tracked Devices
WORLD
  • Axis
  • Billboard
  • GetWorld
  • SetWorld
  • Arrange
  • Ticker
  • Layout
  • Group
  • World Z Sort
  • YesNo
  • Switch
  • Spread
  • Filter Pass
  • Set Pass
  • Hierarchy Container
  • Scene Port
  • Content Container
  • Template Port
  • Container Info
  • Camera
  • Paths
  • Cloner

Advanced and Development

  • Advanced and Development Index
  • Command Line Options
  • Ventuz IP Ports
  • Ventuz Machine Service
  • TUIO
  • .NET Scripting
  • HLSL Shader Programming
  • Ventuz API and SDK
  • Ventuz Extension API
  • Ventuz VIO API
  • Ventuz File Format (VFF)
  • Ventuz Stream Out API
  • Lens Calibration File for FreeD
  • E2E Node Overview
  • Unreal Integration
  • Notch Integration
Remoting
  • Remoting Index
  • Remoting Overview
  • How To Control and Customize Ventuz
  • Remoting 4
  • Remoting 4 via Websockets
  • Remoting 4 via HTTP
  • Director Remoting
  • Deprecated Remoting

Misc

  • Presets
« Previous: Audio Analysis
» Index «
Next: Slide »

Slide Manager

Table of Contents

  1. Slide Manager & Pivots
  2. Slides
  3. Controlling a Slide Show
  4. Slide Port

Slide Manager This node handles the slides and animations and switches between attached Slide nodes.
Slide This node is working as a container, embedding the slide-page content.
Slide Port This node loads external Ventuz scenes and lets them act as a Slide.
Pivot The Pivot acts like a shortcut, defining where a Slide is located in the scene.

Traditional slide based presentations (as created with Microsoft Powerpoint or Apple Keynote) can also be created in Ventuz with the added bonus of being completely animated, in 3D, and far more scalable. The Slide Manager is responsible for managing and controlling all slides and the transitions between them. It is a template oriented tool that distinguishes between two elements of a presentation: The world (or background) and the slides. The author of a presentation can define special locations in the scene called Pivot points which the Slide Manager uses as placeholders for the slides. The contents of the background as well as the individual slides are free to use all of Ventuz' functionality.

Slide Manager & Pivots

The Slide Manager node basically acts like a switch, controlling which of its child slides will be shown.

By default, the Slide Manager node listens for the left mouse button and certain keyboard keys. This can lead to problems when using Interaction Nodes or other input nodes that listen to the same events. In such a case, make sure to deactivate the InputsEnabled property and see the section Controlling a Slide Show later in this document.

The Slide Manager node itself consists of a Hierarchy Container which is used to host all the nodes belonging to the background, an output for each slide and a Slide node automatically added to each output.

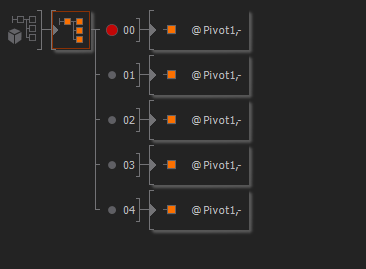
A red circle before the output number indicates the current active Slide. If the circle is green, the Slide is being rendered. If gray, the Slide is completely blocked.

No other node than a Slide (Port) can be attached to a Slide Manager output. There can also be only one Slide per output.

Much like Outputs in a Hierarchy Container, the Slide Manager uses Pivot nodes as connections between the nodes inside of it and the Slides. A pivot represents a location and orientation in the scene where a slide can be shown. When a slide is presented, its complete 3D content will be rendered at the position in the scene. Having multiple pivots can be used to present a group of slides at a different location and then fly back and forth from the main track to this topic group with the camera. The SlideManager provides two output properties. These are SlideCurrent with the index of the active Slide and SlideNames which is an string array with the names of the Slides.

Slides

A Slide in Ventuz is not a 2D sheet of information but rather a small sub-scene with its own objects and animations. The Slide acts as a Hierarchy Container which contains all nodes belonging to the sub-scene. Inside a Slide, all Ventuz nodes can be used so that a slide can be anything from a single Rectangle up to a complex series of camera animations, 3D models and movies playing. The Slide Manager should rather be regarded as a way to give a 3D scene the structure of a slide show rather than a strict means to present 2D content.

There are few requirements or restrictions for a slide. It only has to have an animation that can be used to bring in and out the slide as part of the presentation. The Slide Manager uses the State Animation Logic to manage the execution of individual slides and will automatically look for a keyframe animation node inside a Slide.

A Slide should only contain exactly one animation on its top level as otherwise the Slide Manager might get the wrong one. If additional animation nodes are required, they have to be placed inside Hierarchy Containers.

A Slide can use any number of States but there are three that must exist:

  • Begin State: This defines the slide before it fades in. When the current Slide reaches its end, the Slide Manager will start the next Slide at its begin state and use the Next connection for transition to another state which shows the first step of the slide.
  • Present State: This defines the slide with all its content fully exposed. If the user jumps between slides, the Slide Manager will automatically navigate to this state.
  • End State: This defines the slide after it fades out. When reaching this state, the Slide Manager will stop rendering the current slide and start the next slide.

Every time the user presses the next button in the Slide Manager Toolbar or triggers the next method on the Slide Manager, the State Engine will check for a Next Transition from the current state to another state. It is therefore vital to check the next and prev transitions are correctly set in the State Logic.

The simplest valid state logic for a slide would be three states, a begin, a present and an end state. However, additional states can be used to introduce sub-steps in a slide. For example, with every call of next, another text label may be revealed until the whole slide is visible. To learn more about creating an animation, see Animation and State Engine as well as Animation Editor.

A Slide has various Input Properties that will influence how the Slide Manager will show the Slide in the context of a slide show. The Pivot property lets the user choose from a list of all pivots where the slide is to be positioned in the world. State will list all states of the State Logic contained in the world and by choosing one of the entries, the Slide Manager will transition to that State when the Slide is shown. This can be used to synchronize animations of the world to specific slides.

EaseIn and EaseOut control the offset that is used when a slide is supposed to fade in or out. For example, by assigning a negative value to EaseIn, the fade-in animation of the slide will start while the previous slide is still fading out. By deactivating the Active flag, a slide will be skipped when moving through the slide show.

To Append or Remove a Slide click  on the Slide Manager until the context menu appears and select the appropriate command at the top of the context menu or use one of the button on the very bottom of the Property Editor.

Controlling a Slide Show

There are three ways to control a slide show through its Slide Manager:

  1. Slide Manager Toolbar: The toolbar is usually only used during construction of a scene.
  2. Slide Manager Methods: All buttons found in the Slide Manager Toolbar have an equivalent which can be found on the Input Property page of the Slide Manager node. These methods can for example be bound to OSC Nodes to trigger them from an external device.
  3. Predefined keys: If InputsEnabled is true, the Slight Manager will react to a number of predefined keys.
Key Function
Back, Up, Left, Browser Back Previous Step
Space, Down, Right, Browser Forward Next Step
Left Mouse Button Next Step
Page Up Jump to previous slide
Page Down Jump to next slide
R, Home, Browser Home Reset the slide show

If AutoDeactivate is true, the Slide Manager will not receive any input from the keyboard or mouse if the container, it is part of, is inactive.

If you want the SlideManager to jump to a specific Slide bind an Event with an according Argument value to the Reset method.

By default, both the current slide and its neighbors will be rendered but all other slides are blocked. By changing VisibleMode, the behavior can be changed to not block any slide or only unblock the current slide. This can be important so that Slides properly validate themselves even if they are not the current slide.

Finally, Wrap will cause the slide show to start at the beginning of the first slide when the last slide is done and WorldSpeed can be used to adjust the rate at which animations in the world are played back.

The Slide Manager also has an output property that provides the Current slide number which can for example be used to show the slight number somewhere in the scene.

Slide Port

The Slide Port node is a special node that can be used instead of a Slide node. It works similar to the Scene Port Node but in addition enables the Slide Manager to find the required animation inside the referenced scene. With a Scene Port node, the Slide Manager would not be able to find the underlying animation.

See also:
  • Hierarchy Container node
  • Animation and State Engine
  • Animation Editor

« Previous: Audio Analysis
» Index «
Next: Slide »
Copyright 2025 Ventuz Technology